
| IP | HOSTNAME | 启动服务 |
|---|---|---|
| 64.115.3.30 | hadoop30 | Namenode\Datanode\NodeManager\JournalNode\Zookeeper\ZKFC |
| 64.115.3.40 | hadoop40 | Namenode\ResourceManager\Datanode\NodeManager\JournalNode\Zookeeper\ZKFC |
| 64.115.3.50 | hadoop50 | Namenode\ResourceManager\Datanode\NodeManager\JournalNode\Zookeeper\ZKFC |
注意事项:
1、SSH 免密登录要三台服务器互相配置
2、最小化安装的Centos7操作系统需要安装一下psmisc 这个软件包,ZKFC 切换active namenode时使用。
一、初始服务器
每台服务器都要修改,都是基本操作不细说下面举个例子
- 配置主机IP
$ vim /etc/sysconfig/network-scripts/ifcfg-ens33

TYPE=Ethernet
PROXY_METHOD=none
BROWSER_ONLY=no
BOOTPROTO=static
DEFROUTE=yes
IPV4_FAILURE_FATAL=no
IPV6INIT=yes
IPV6_AUTOCONF=yes
IPV6_DEFROUTE=yes
IPV6_FAILURE_FATAL=no
IPV6_ADDR_GEN_MODE=stable-privacy
NAME=ens33
UUID=1fce55bf-9a16-45ab-abce-386039d76568
DEVICE=ens33
ONBOOT=yes

IPADDR=64.115.3.30
GATEWAY=64.115.3.1
NETMASK=255.255.255.0
DNS1=114.114.114.114
DNS2=8.8.8.8
- 配置主机名称
hostnamectl set-hostname hadoop30
- 配置域名解析
$ vim /etc/hosts
127.0.0.1   localhost localhost.localdomain localhost4 localhost4.localdomain4
::1         localhost localhost.localdomain localhost6 localhost6.localdomain6
64.115.3.30  hadoop30
64.115.3.40  hadoop40
64.115.3.50  hadoop50
- 关闭防火墙
systemctl stop firewalld
systemctl disable firewalld
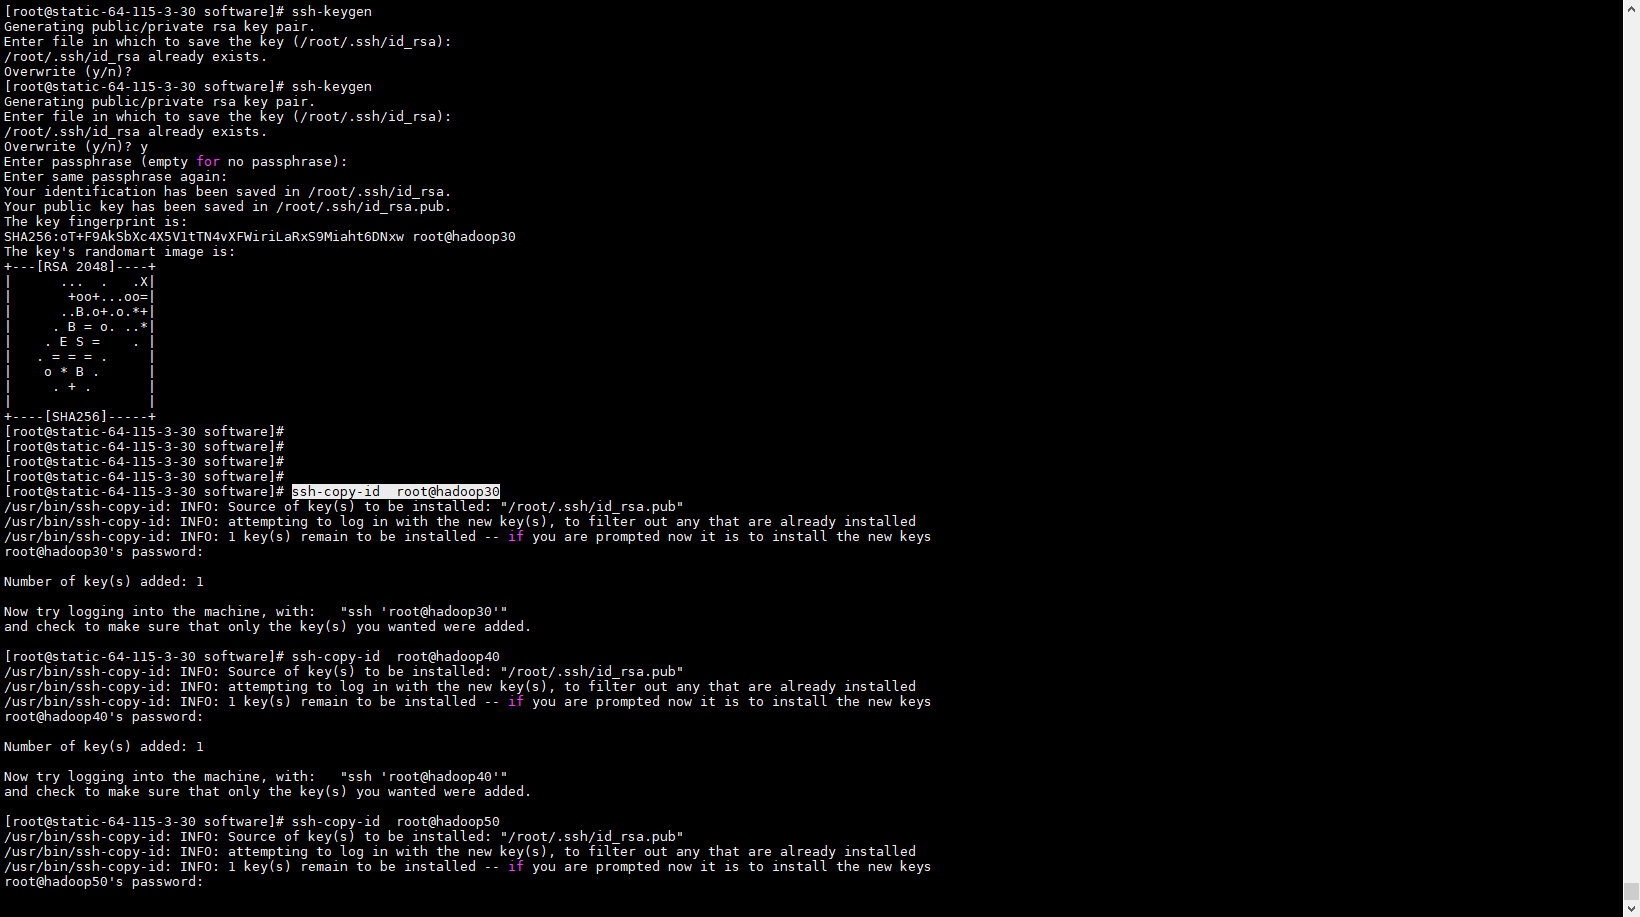
- 配置ssh 免密登录
SSH 免密登录要三台服务器互相配置
#hadoop30、40、50 服务器上执行
ssh-keygen
ssh-copy-id  root@hadoop30
ssh-copy-id  root@hadoop40
ssh-copy-id  root@hadoop50
- 安装依赖包
#这个软件是zkfc 在做自动切换的时候需要用的,最小化安装的centos7系统默认没有这个软件,造成自动切换失败。
yum install psmisc
二、下载安装包,配置环境变量,安装Zookeeper
我的软件安装目录是 /software
mkdir /software
下载地址:
JAVA JDK : https://www.oracle.com/java/technologies/javase/javase-jdk8-downloads.html
HADOOP : https://www.apache.org/dyn/closer.cgi/hadoop/common/hadoop-3.3.0/hadoop-3.3.0.tar.gz
Zookeeper : 安装配置方式 传送门
注意:Zookeeper 安裝包下載的時候下载带-bin 的压缩包apache-zookeeper-3.7.0-bin.tar.gz
- 解压
  tar -zxvf jdk-8u271-linux-x64.tar.gz
  tar -zxvf hadoop-3.3.0.tar.gz

- 配置环境变量
$ vim /etc/profile 最后面追加以下内容
#java
export JAVA_HOME=/software/jdk1.8.0_271
export PATH=$JAVA_HOME/bin:$PATH
export CLASSPATH=.:$JAVA_HOME/lib/dt.jar:$JAVA_HOME/lib/tools.jar

#hadoop
export HADOOP_HOME=/software/hadoop-3.3.0
export PATH=$PATH:$HADOOP_HOME/bin
export PATH=$PATH:$HADOOP_HOME/sbin
export HADOOP_OPTS="-Djava.library.path=$HADOOP_HOME/lib:$HADOOP_HOME/lib/native"
#zookeeper
export ZOOKEEPER_HOME=/software/apache-zookeeper-3.7.0-bin
export PATH=$PATH:$ZOOKEEPER_HOME/bin
#脚本
export PATH=/root:$PATH
- 编写两个小脚本,用于后续同步文件,查看进程
$ cd /root
$ vim xsync

#!/bin/bash
# 判断参数个数
if [ $# -lt 1  ]
then
  echo "没有传递参数!"
  exit;
fi

# 遍历群集所有机器
for host in 64.115.3.30  64.115.3.40  64.115.3.50
do
   echo "============================= $host ==========================="
   #遍历所有目录,挨个发送
   for file in $@
   do
       #判断文件是否存在
       if [ -e $file ]
          then
               #获取父目录
               pdir=$( cd -P $(dirname $file ); pwd )
               #获取当前文件的名称
               fname=$(basename $file)
               ssh $host "mkdir -p $pdir"
               rsync -av $pdir/$fname  $host:$pdir
           else
               echo "$file  不存在!"
         fi
    done
done
$ vim jpsall

#!/bin/bash
for host in hadoop30 hadoop40 hadoop50
do
 echo =============== $host ===============
 ssh $host    /software/jdk1.8.0_271/bin/jps
done
#加个执行权限
$ chmod +x xsync
三、修改Hadoop 群集配置
每项配置基本都有注释,很好理解。
-
配置hadoop.env.sh
#设置为Java安装的根目录 export JAVA_HOME=/software/jdk1.8.0_271 export HADOOP_PID_DIR=/software/hadoop-3.3.0/tmp #将运行用户设置为root 用户 export HDFS_NAMENODE_USER=root export HDFS_DATANODE_USER=root export HDFS_SECONDARYNAMENODE_USER=root export YARN_RESOURCEMANAGER_USER=root export YARN_NODEMANAGER_USER=root export HDFS_JOURNALNODE_USER=root export HDFS_ZKFC_USER=root -
配置hdfs.site.xml
<?xml version="1.0" encoding="UTF-8"?> <?xml-stylesheet type="text/xsl" href="configuration.xsl"?> <!-- Licensed under the Apache License, Version 2.0 (the "License"); you may not use this file except in compliance with the License. You may obtain a copy of the License at http://www.apache.org/licenses/LICENSE-2.0 Unless required by applicable law or agreed to in writing, software distributed under the License is distributed on an "AS IS" BASIS, WITHOUT WARRANTIES OR CONDITIONS OF ANY KIND, either express or implied. See the License for the specific language governing permissions and limitations under the License. See accompanying LICENSE file. --> <!-- Put site-specific property overrides in this file. --> <configuration> <!--副本数 默认为 3 --> <property> <name>dfs.replication</name> <value>3</value> </property> <!-- hdfs 集群名称--> <property> <name>dfs.nameservices</name> <value>mycluster</value> </property> <!--集群内namenode配置--> <property> <name>dfs.ha.namenodes.mycluster</name> <value>nn30,nn40,nn50</value> </property> <!-- namenode rpc 通信端口 --> <property> <name>dfs.namenode.rpc-address.mycluster.nn30</name> <value>hadoop30:8020</value> </property> <property> <name>dfs.namenode.rpc-address.mycluster.nn40</name> <value>hadoop40:8020</value> </property> <property> <name>dfs.namenode.rpc-address.mycluster.nn50</name> <value>hadoop50:8020</value> </property> <!-- namenode WEB 端配置 --> <property> <name>dfs.namenode.http-address.mycluster.nn1</name> <value>hadoop30:9870</value> </property> <property> <name>dfs.namenode.http-address.mycluster.nn2</name> <value>hadoop40:9870</value> </property> <property> <name>dfs.namenode.http-address.mycluster.nn3</name> <value>hadoop50:9870</value> </property> <!-- 指定NameNode元数据在JournalNode上的存放位置 --> <property> <name>dfs.namenode.shared.edits.dir</name> <value>qjournal://hadoop30:8485;hadoop40:8485;hadoop50:8485/mycluster</value> </property> <!-- 声明journalnode服务器存储目录--> <property> <name>dfs.journalnode.edits.dir</name> <value>/data/hadoop/journalnode</value> </property> <!-- HDFS客户端用于联系Active NameNode的Java类 --> <property> <name>dfs.client.failover.proxy.provider.mycluster</name> <value>org.apache.hadoop.hdfs.server.namenode.ha.ConfiguredFailoverProxyProvider</value> </property> <!-- 在故障转移期间将用于隔离Active NameNode的脚本或Java类的列表 --> <property> <name>dfs.ha.fencing.methods</name> <value>sshfence</value> <!--SSH到Active NameNode并终止进程,同一时刻只能有一台服务对外相应--> </property> <property> <name>dfs.ha.fencing.ssh.private-key-files</name> <value>/root/.ssh/id_rsa</value> <!-- 用于ssh登录的私钥 --> </property> <!-- 启用故障自动转移 --> <property> <name>dfs.ha.automatic-failover.enabled</name> <value>true</value> </property> <!-- 白名单 <property> <name>dfs.hosts</name> <value>/software/hadoop-3.3.0/etc/hadoop/whitelist</value> </property> --> <!-- 黑名单 <property> <name>dfs.hosts.exclude</name> <value>/software/hadoop-3.3.0/etc/hadoop/blacklist</value> </property> --> </configuration> -
配置core.site.xnl
<?xml version="1.0" encoding="UTF-8"?> <?xml-stylesheet type="text/xsl" href="configuration.xsl"?> <!-- Licensed under the Apache License, Version 2.0 (the "License"); you may not use this file except in compliance with the License. You may obtain a copy of the License at http://www.apache.org/licenses/LICENSE-2.0 Unless required by applicable law or agreed to in writing, software distributed under the License is distributed on an "AS IS" BASIS, WITHOUT WARRANTIES OR CONDITIONS OF ANY KIND, either express or implied. See the License for the specific language governing permissions and limitations under the License. See accompanying LICENSE file. --> <!-- Put site-specific property overrides in this file. --> <configuration> <!--定义namenode地址--> <property> <name>fs.defaultFS</name> <value>hdfs://mycluster</value> </property> <!-- 配置Zookeeper 地址 --> <property> <name>ha.zookeeper.quorum</name> <value>hadoop30:2181,hadoop40:2181,hadoop50:2181</value> </property> <!--修改hadoop存储数据的默认位置--> <property> <name>hadoop.tmp.dir</name> <value>/data/hadoop</value> </property> <!-- 启用回收站,垃圾回收时间为5分钟 --> <property> <name>fs.trash.interval</name> <value>5</value> </property> <!-- 当前用户全设置成root --> <property> <name>hadoop.http.staticuser.user</name> <value>root</value> </property> <!-- 不开启权限检查 --> <property> <name>dfs.permissions.enabled</name> <value>false</value> </property> </configuration> -
配置yarn.site.xml
<?xml version="1.0"?> <!-- Licensed under the Apache License, Version 2.0 (the "License"); you may not use this file except in compliance with the License. You may obtain a copy of the License at http://www.apache.org/licenses/LICENSE-2.0 Unless required by applicable law or agreed to in writing, software distributed under the License is distributed on an "AS IS" BASIS, WITHOUT WARRANTIES OR CONDITIONS OF ANY KIND, either express or implied. See the License for the specific language governing permissions and limitations under the License. See accompanying LICENSE file. --> <!-- Site specific YARN configuration properties --> <configuration> <!--指定MR走shuffle协议 --> <property> <name>yarn.nodemanager.aux-services</name> <value>mapreduce_shuffle</value> </property> <!-- yarn ha 启动 --> <property> <name>yarn.resourcemanager.ha.enabled</name> <value>true</value> </property> <property> <name>yarn.resourcemanager.cluster-id</name> <value>yarn-cluster</value> </property> <property> <name>yarn.resourcemanager.ha.rm-ids</name> <value>rm1,rm2</value> </property> <property> <name>yarn.resourcemanager.hostname.rm1</name> <value>hadoop40</value> </property> <property> <name>yarn.resourcemanager.hostname.rm2</name> <value>hadoop50</value> </property> <!-- yarn web 端地址端口 --> <property> <name>yarn.resourcemanager.webapp.address.rm1</name> <value>hadoop40:8088</value> </property> <property> <name>yarn.resourcemanager.webapp.address.rm2</name> <value>hadoop50:8088</value> </property> <!-- Zookeeper 地址端口 --> <property> <name>hadoop.zk.address</name> <value>hadoop30:2181,hadoop40:2181,hadoop50:2181</value> </property> <!-- 下面配置都是优化项,根据个人服务器配置来修改,只做HA实验的话可以不加。 --> <!-- 选择调度器,默认容量 --> <property> <description>The class to use as the resource scheduler.</description> <name>yarn.resourcemanager.scheduler.class</name> <value>org.apache.hadoop.yarn.server.resourcemanager.scheduler.capacity.CapacityScheduler</value> </property> <!-- ResourceManager 处理调度器请求的线程数量,默认 50;如果提交的任务数大于 50,可以 增加该值,但是不能超过 3 台 * 4 线程 = 12 线程(去除其他应用程序实际不能超过 8) --> <property> <description>Number of threads to handle scheduler interface.</description> <name>yarn.resourcemanager.scheduler.client.thread-count</name> <value>8</value> </property> <!-- 是否让 yarn 自动检测硬件进行配置,默认是 false,如果该节点有很多其他应用程序,建议 手动配置。如果该节点没有其他应用程序,可以采用自动 --> <property> <description>Enable auto-detection of node capabilities such as memory and CPU.</description> <name>yarn.nodemanager.resource.detect-hardware-capabilities</name> <value>false</value> </property> <!-- 是否将虚拟核数当作 CPU 核数,默认是 false,采用物理 CPU 核数 --> <property> <description>Flag to determine if logical processors(such as hyperthreads) should be counted as cores. Only applicable on Linux when yarn.nodemanager.resource.cpu-vcores is set to -1 and yarn.nodemanager.resource.detect-hardware-capabilities is true. </description> <name>yarn.nodemanager.resource.count-logical-processors-as-cores</name> <value>false</value> </property> <!-- 虚拟核数和物理核数乘数,默认是 1.0 --> <property> <description>Multiplier to determine how to convert phyiscal cores to vcores. This value is used if yarn.nodemanager.resource.cpu-vcores is set to -1(which implies auto-calculate vcores) and yarn.nodemanager.resource.detect-hardware-capabilities is set to true. The number of vcores will be calculated as number of CPUs * multiplier. </description> <name>yarn.nodemanager.resource.pcores-vcores-multiplier</name> <value>1.0</value> </property> <!-- NodeManager 使用内存数,默认 8G,修改为 4G 内存 --> <property> <description>Amount of physical memory, in MB, that can be allocated for containers. If set to -1 and yarn.nodemanager.resource.detect-hardware-capabilities is true, it is automatically calculated(in case of Windows and Linux). In other cases, the default is 8192MB. </description> <name>yarn.nodemanager.resource.memory-mb</name> <value>4096</value> </property> <!-- nodemanager 的 CPU 核数,不按照硬件环境自动设定时默认是 8 个,修改为 4 个 --> <property> <description>Number of vcores that can be allocated for containers. This is used by the RM scheduler when allocating resources for containers. This is not used to limit the number of CPUs used by YARN containers. If it is set to -1 and yarn.nodemanager.resource.detect-hardware-capabilities is true, it is automatically determined from the hardware in case of Windows and Linux. In other cases, number of vcores is 8 by default.</description> <name>yarn.nodemanager.resource.cpu-vcores</name> <value>4</value> </property> <!-- 容器最小内存,默认 1G --> <property> <description>The minimum allocation for every container request at the RM in MBs. Memory requests lower than this will be set to the value of this property. Additionally, a node manager that is configured to have less memory than this value will be shut down by the resource manager. </description> <name>yarn.scheduler.minimum-allocation-mb</name> <value>1024</value> </property> <!-- 容器最大内存,默认 8G,修改为 2G --> <property> <description>The maximum allocation for every container request at the RM in MBs. Memory requests higher than this will throw an InvalidResourceRequestException. </description> <name>yarn.scheduler.maximum-allocation-mb</name> <value>2048</value> </property> <!-- 容器最小 CPU 核数,默认 1 个 --> <property> <description>The minimum allocation for every container request at the RM in terms of virtual CPU cores. Requests lower than this will be set to the value of this property. Additionally, a node manager that is configured to have fewer virtual cores than this value will be shut down by the resource manager. </description> <name>yarn.scheduler.minimum-allocation-vcores</name> <value>1</value> </property> <!-- 容器最大 CPU 核数,默认 4 个,修改为 2 个 --> <property> <description>The maximum allocation for every container request at the RM in terms of virtual CPU cores. Requests higher than this will throw an InvalidResourceRequestException.</description> <name>yarn.scheduler.maximum-allocation-vcores</name> <value>2</value> </property> <!-- 虚拟内存检查,默认打开,修改为关闭 --> <property> <description>Whether virtual memory limits will be enforced for containers.</description> <name>yarn.nodemanager.vmem-check-enabled</name> <value>false</value> </property> <!-- 虚拟内存和物理内存设置比例,默认 2.1 --> <property> <description>Ratio between virtual memory to physical memory when setting memory limits for containers. Container allocations are expressed in terms of physical memory, and virtual memory usage is allowed to exceed this allocation by this ratio. </description> <name>yarn.nodemanager.vmem-pmem-ratio</name> <value>2.1</value> </property> <!-- 配置最大优先级 --> <property> <name>yarn.cluster.max-application-priority</name> <value>5</value> </property> </configuration> -
配置mapred.site.xml
<?xml version="1.0"?> <?xml-stylesheet type="text/xsl" href="configuration.xsl"?> <!-- Licensed under the Apache License, Version 2.0 (the "License"); you may not use this file except in compliance with the License. You may obtain a copy of the License at http://www.apache.org/licenses/LICENSE-2.0 Unless required by applicable law or agreed to in writing, software distributed under the License is distributed on an "AS IS" BASIS, WITHOUT WARRANTIES OR CONDITIONS OF ANY KIND, either express or implied. See the License for the specific language governing permissions and limitations under the License. See accompanying LICENSE file. --> <!-- Put site-specific property overrides in this file. --> <configuration> <!--指定MapReduce 程序运行在Yarn 上 --> <property> <name>mapreduce.framework.name</name> <value>yarn</value> </property> <!--继承环境变量 --> <property> <name>yarn.app.mapreduce.am.env</name> <value>HADOOP_MAPRED_HOME=${HADOOP_HOME}</value> </property> <property> <name>mapreduce.map.env</name> <value>HADOOP_MAPRED_HOME=${HADOOP_HOME}</value> </property> <property> <name>mapreduce.reduce.env</name> <value>HADOOP_MAPRED_HOME=${HADOOP_HOME}</value> </property> <!--指定Job历史服务器地址--> <property> <name>mapreduce.jobhistory.address</name> <value>hadoop50:10020</value> </property> <!--指定Job历史服务器WEB端地址 http--> <property> <name>mapreduce.jobhistory.webapp.address</name> <value>hadoop50:19888</value> </property> </configuration> -
配置workers 旧版本叫 slave
hadoop30
hadoop40
hadoop50
四、初始化启动集群
-
创建数据目录
mkdir -p /data/hadoop -
复制hadoop到其余机器
配置文件修改好之后,可以用编写好的xsync 脚本,将hadoop 复制到其余机器。
#同步Hadoop配置 xsync /software/hadoop-3.3.0 #同步Hadoop数据目录 xsync /data/hadoop -
启动JournalNode
# hadoop30 下启动 journalnode
hadoop-daemon.sh start journalnode

# hadoop40  下启动 journalnode
hadoop-daemon.sh start journalnode

# hadoop50  下启动 journalnode
hadoop-daemon.sh start journalnode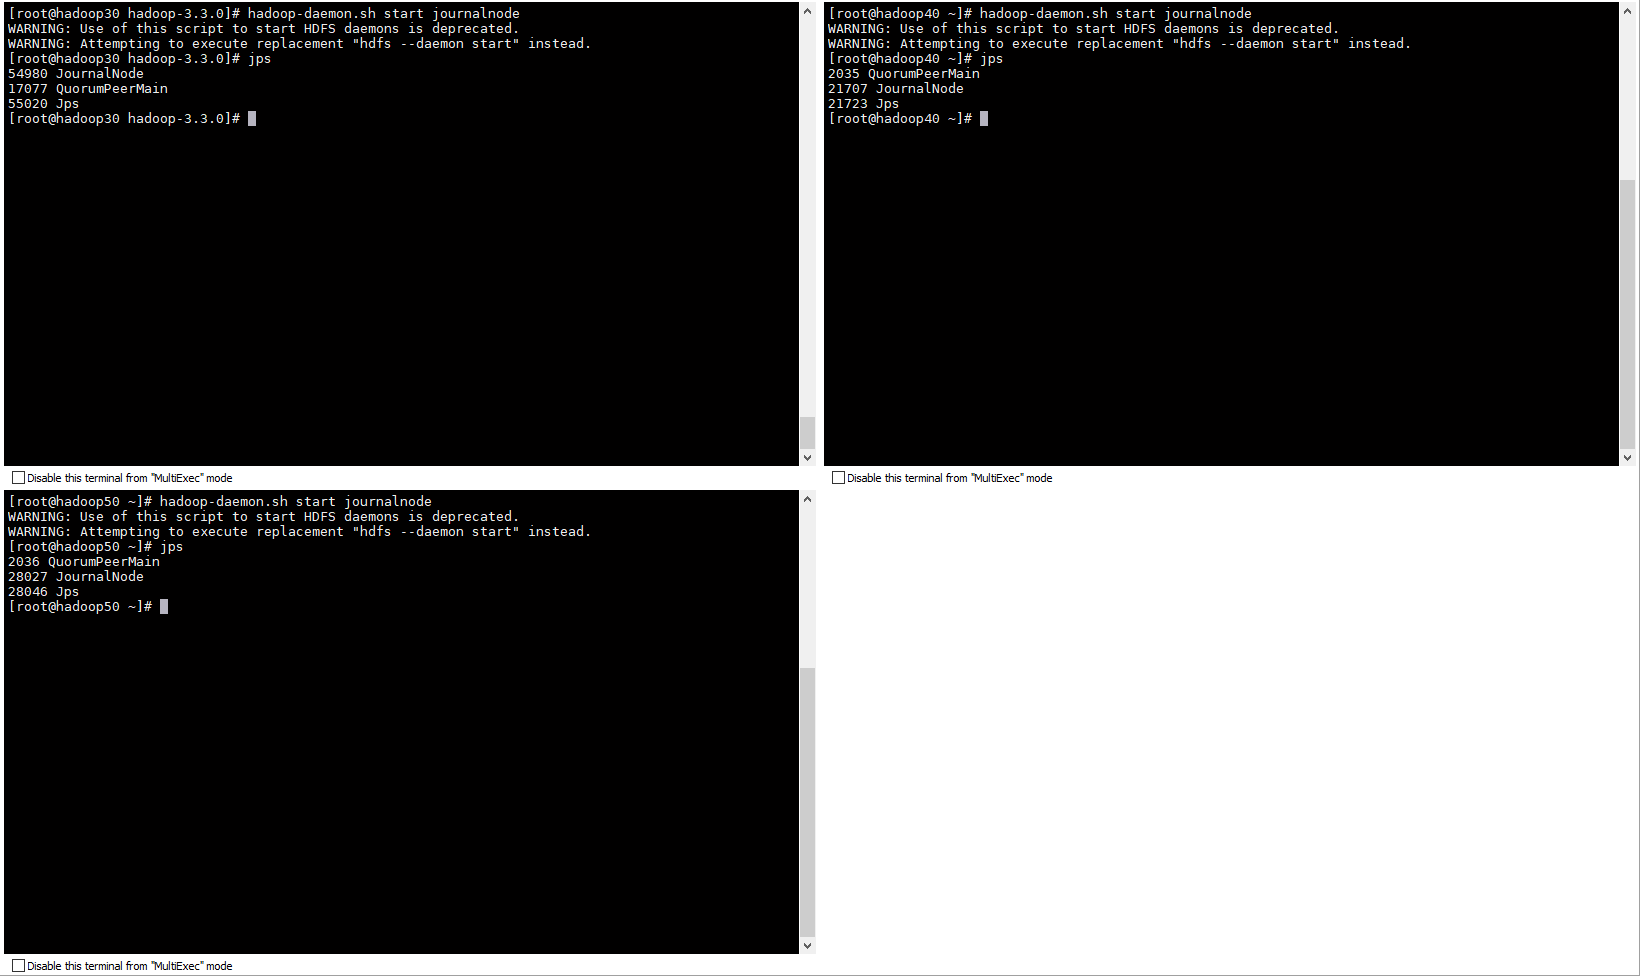
-
选择一个 Namenode 做格式化
# 格式化 hadoop30 下的 namenode
hdfs namenode -format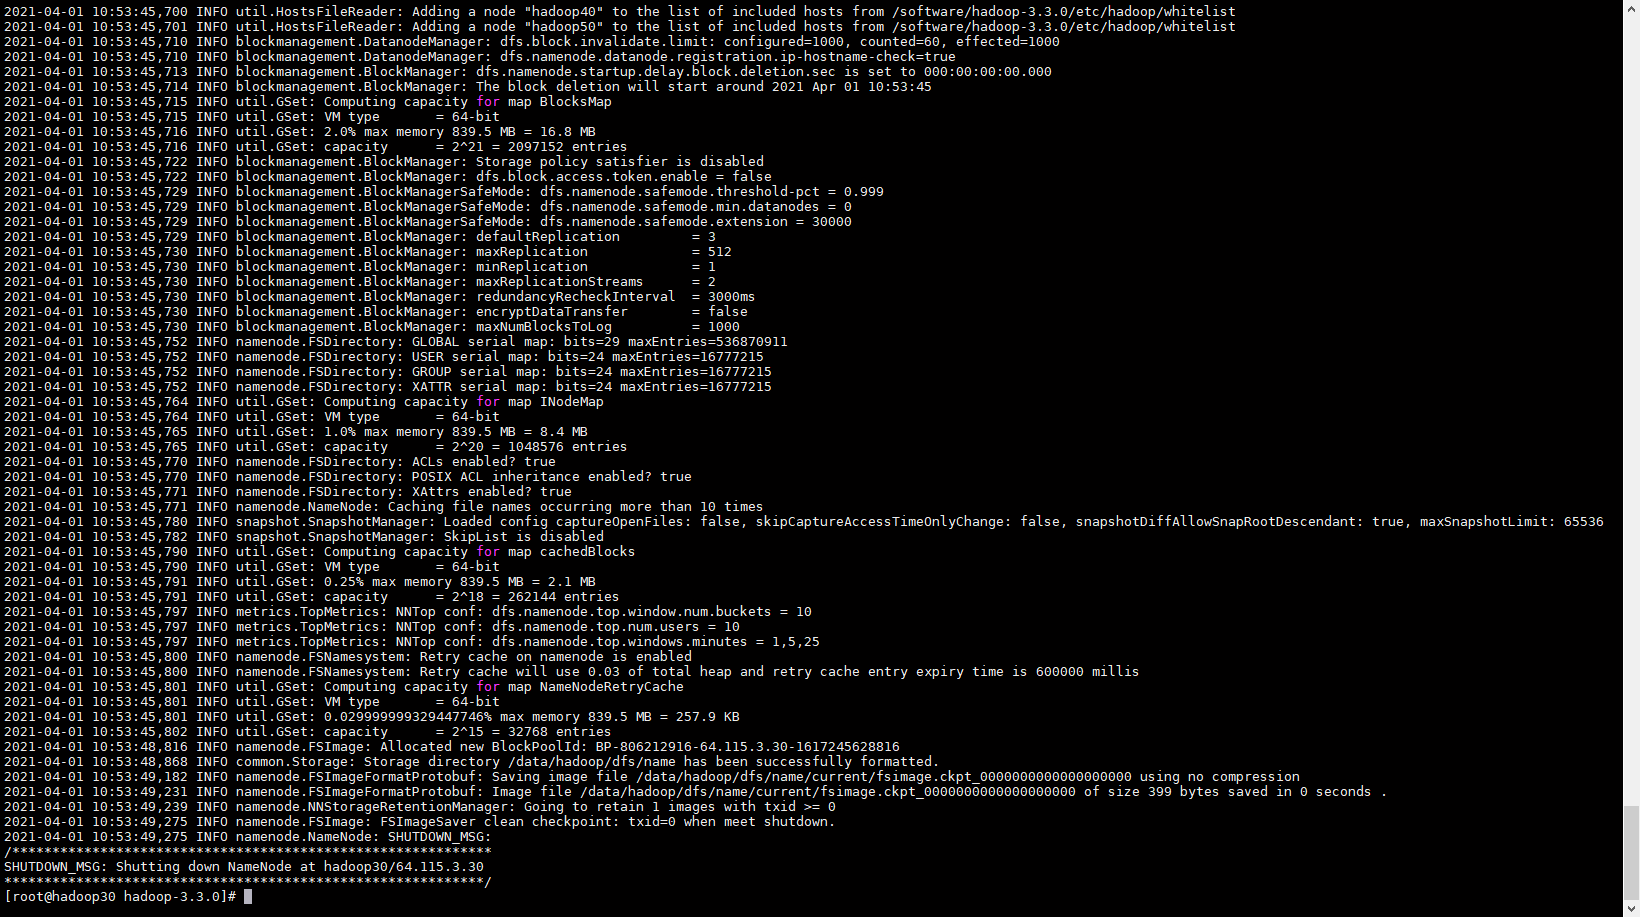
-
启动格式化后的 Namenode
# 启动 hadoop30 下的 namenode
hadoop-daemon.sh start namenode
-
另外几台 Namenode 同步元数据
# hadoop40 同步namenode元数据
hdfs namenode -bootstrapStandby

# hadoop50 同步namenode元数据
hdfs namenode -bootstrapStandby
-
格式化 Zookeeper
# hadoop30 执行格式化 ZooKeeper 集群
hdfs zkfc -formatZK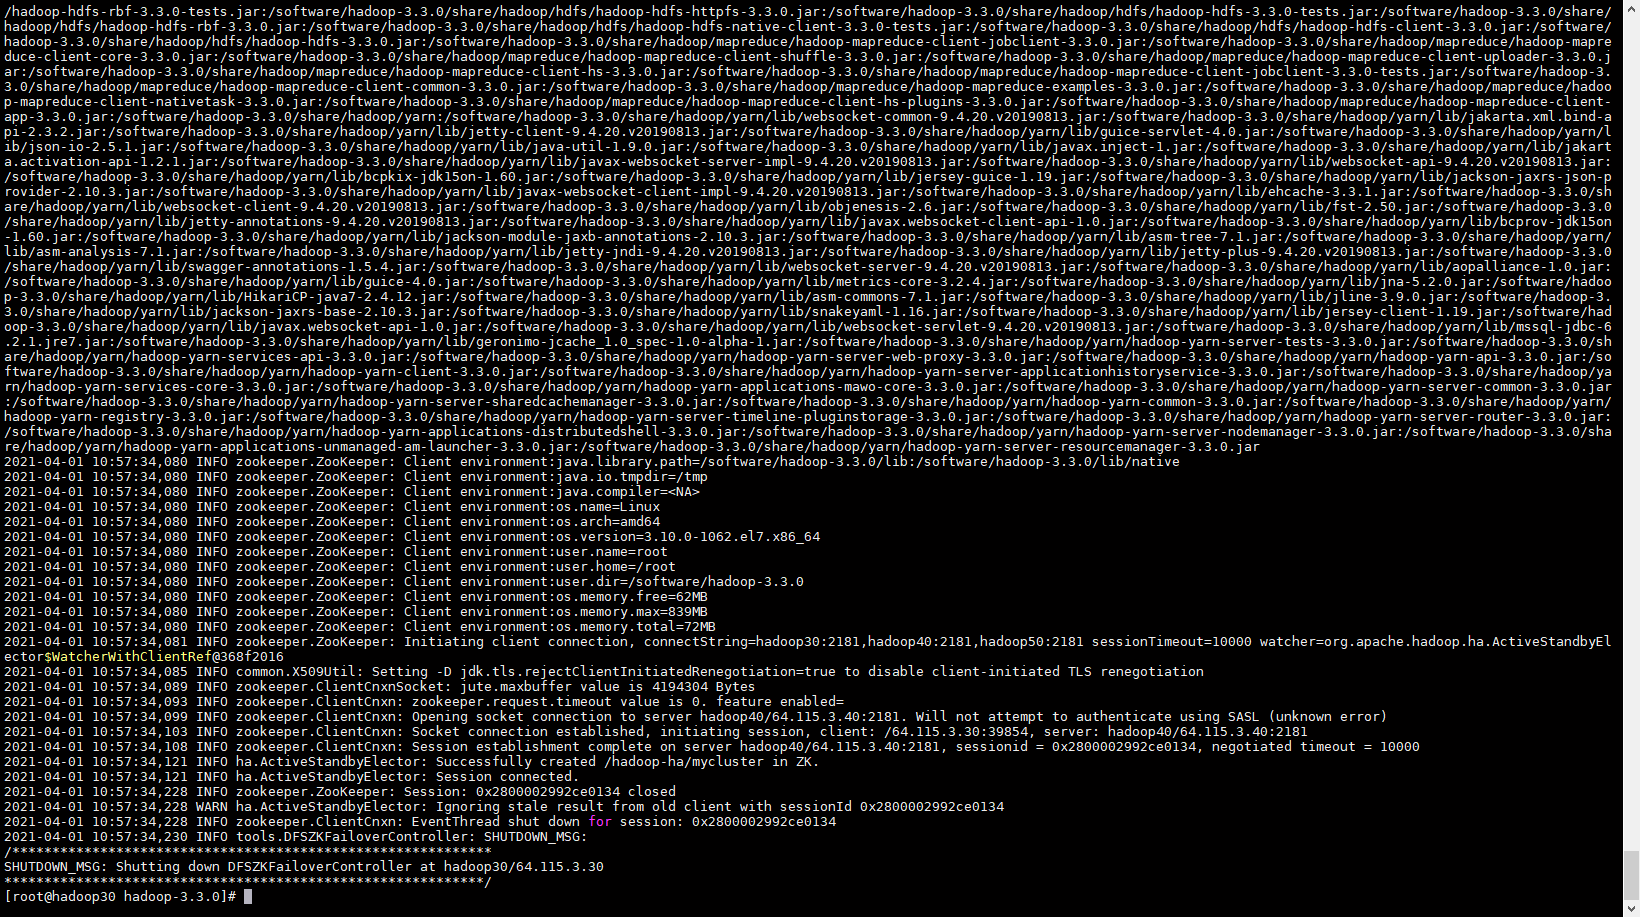
-
启动Hadoop HA 集群
start-dfs.sh
start-yarn.sh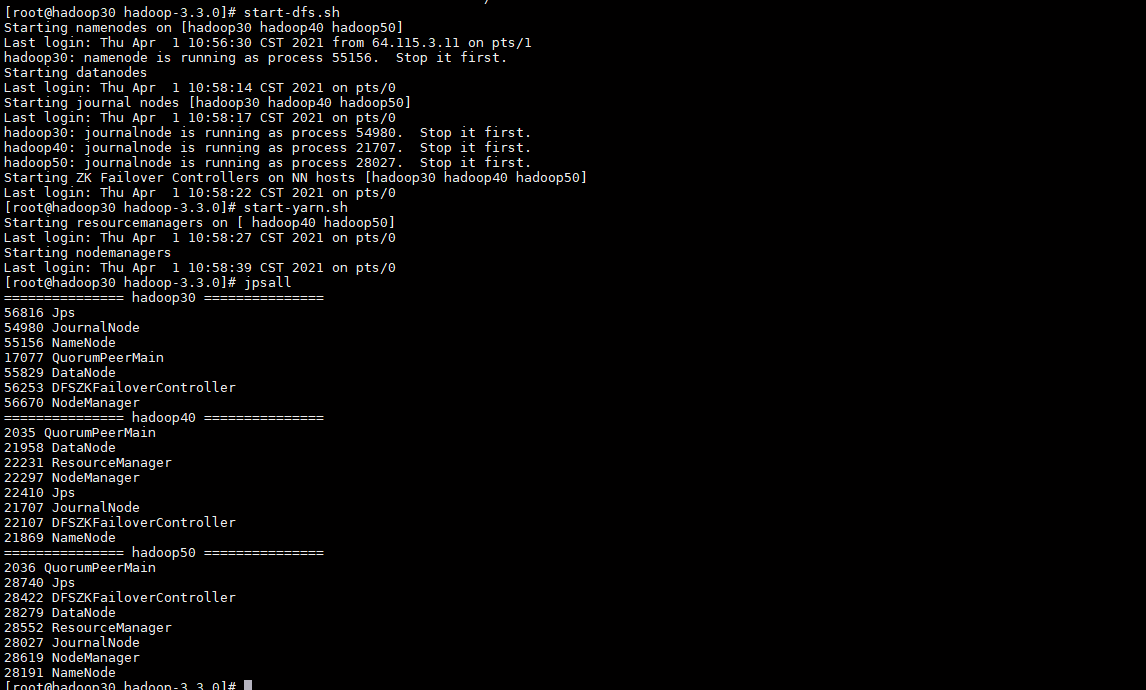
-
启动历史服务器
#hadoop50 服务器执行
mapred --daemon start historyserver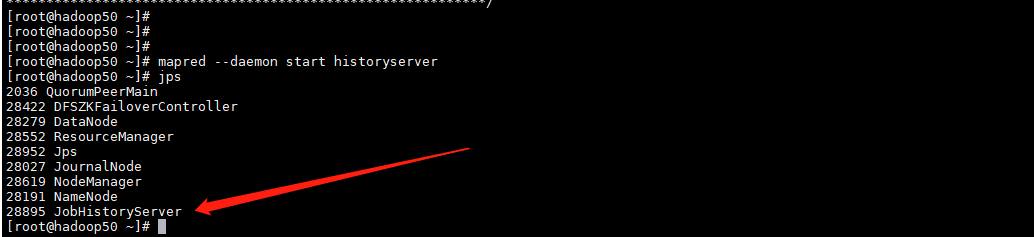
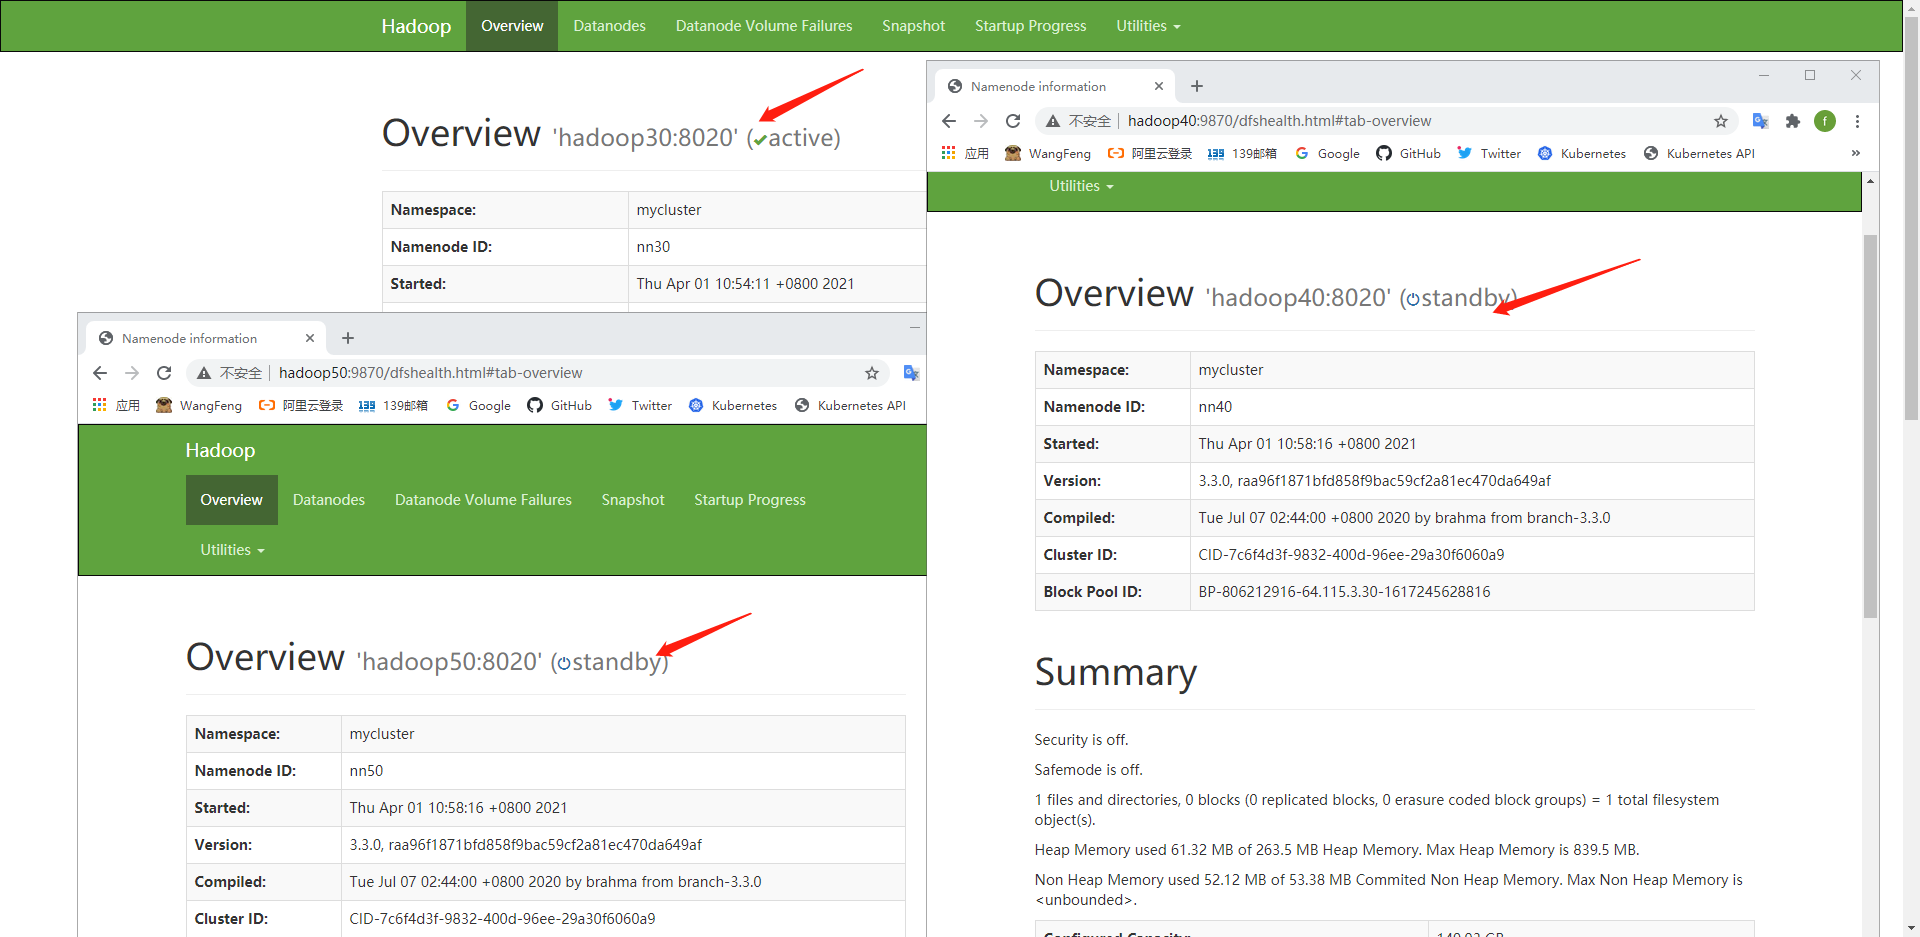
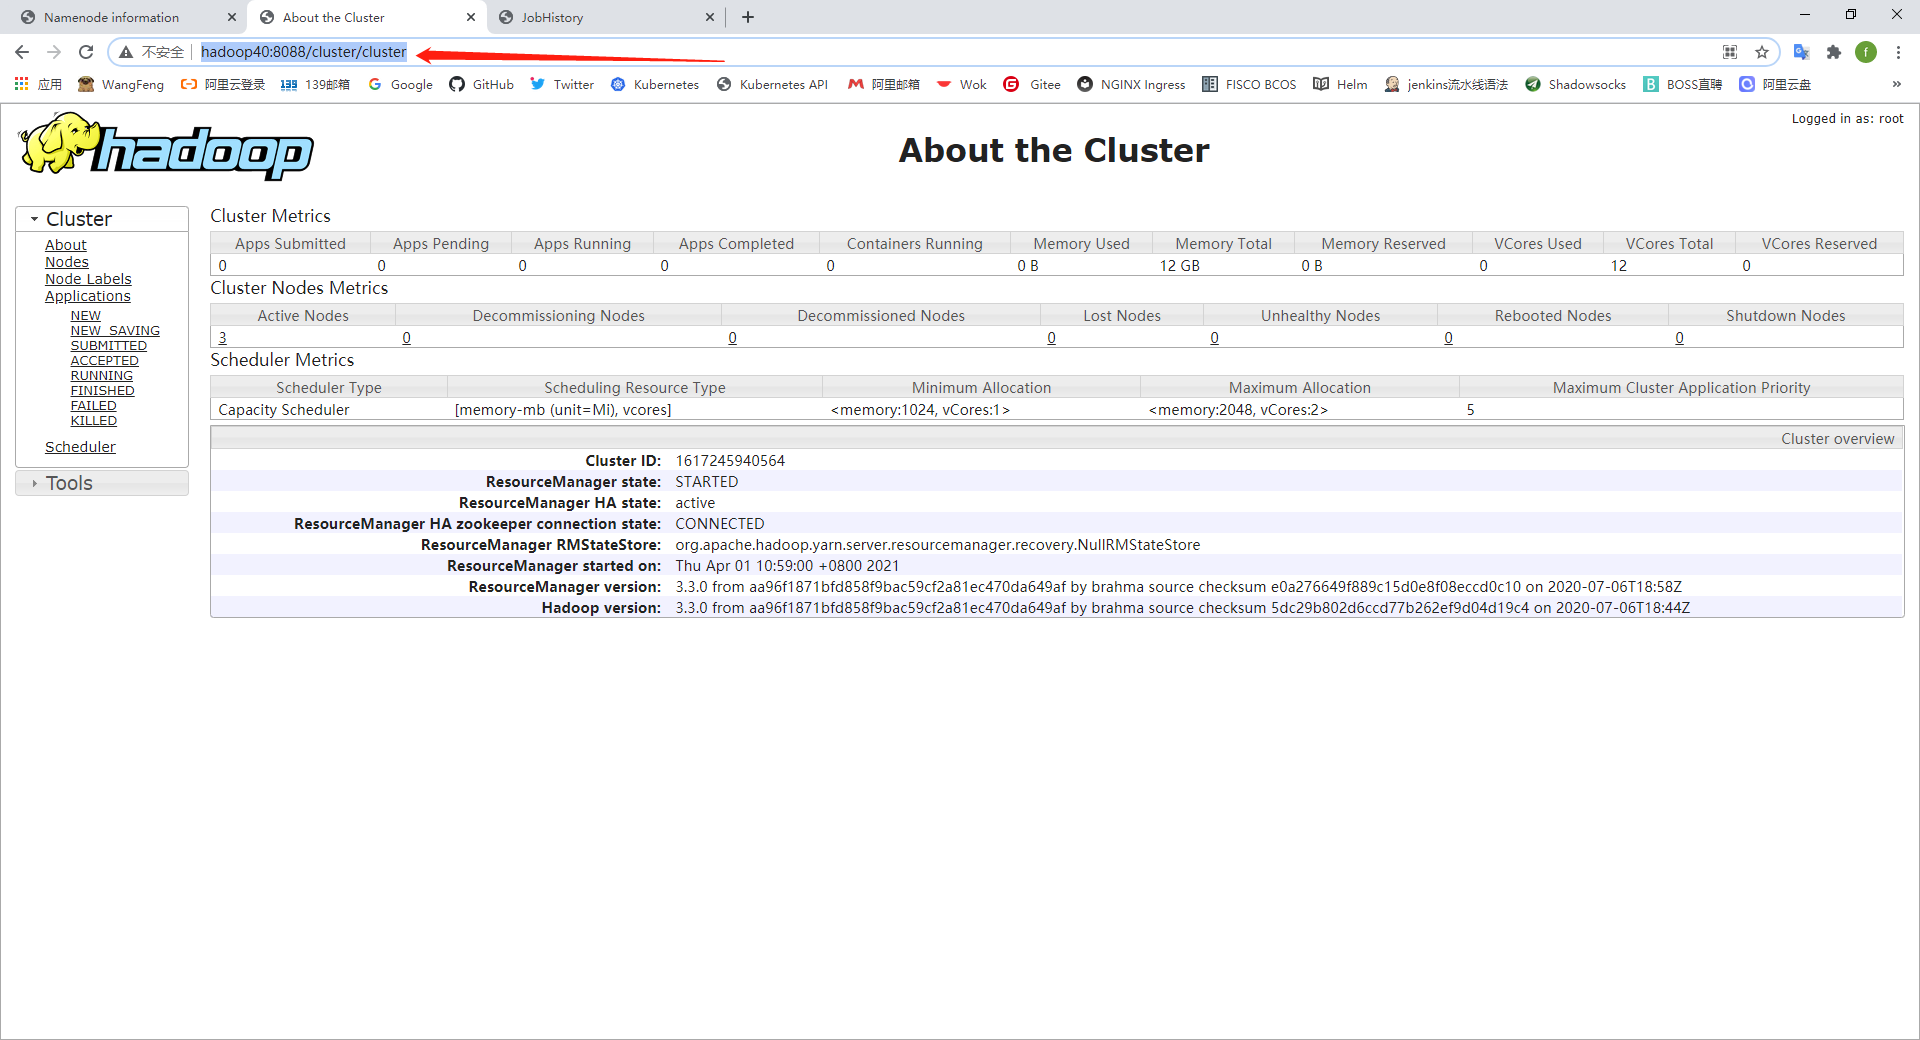
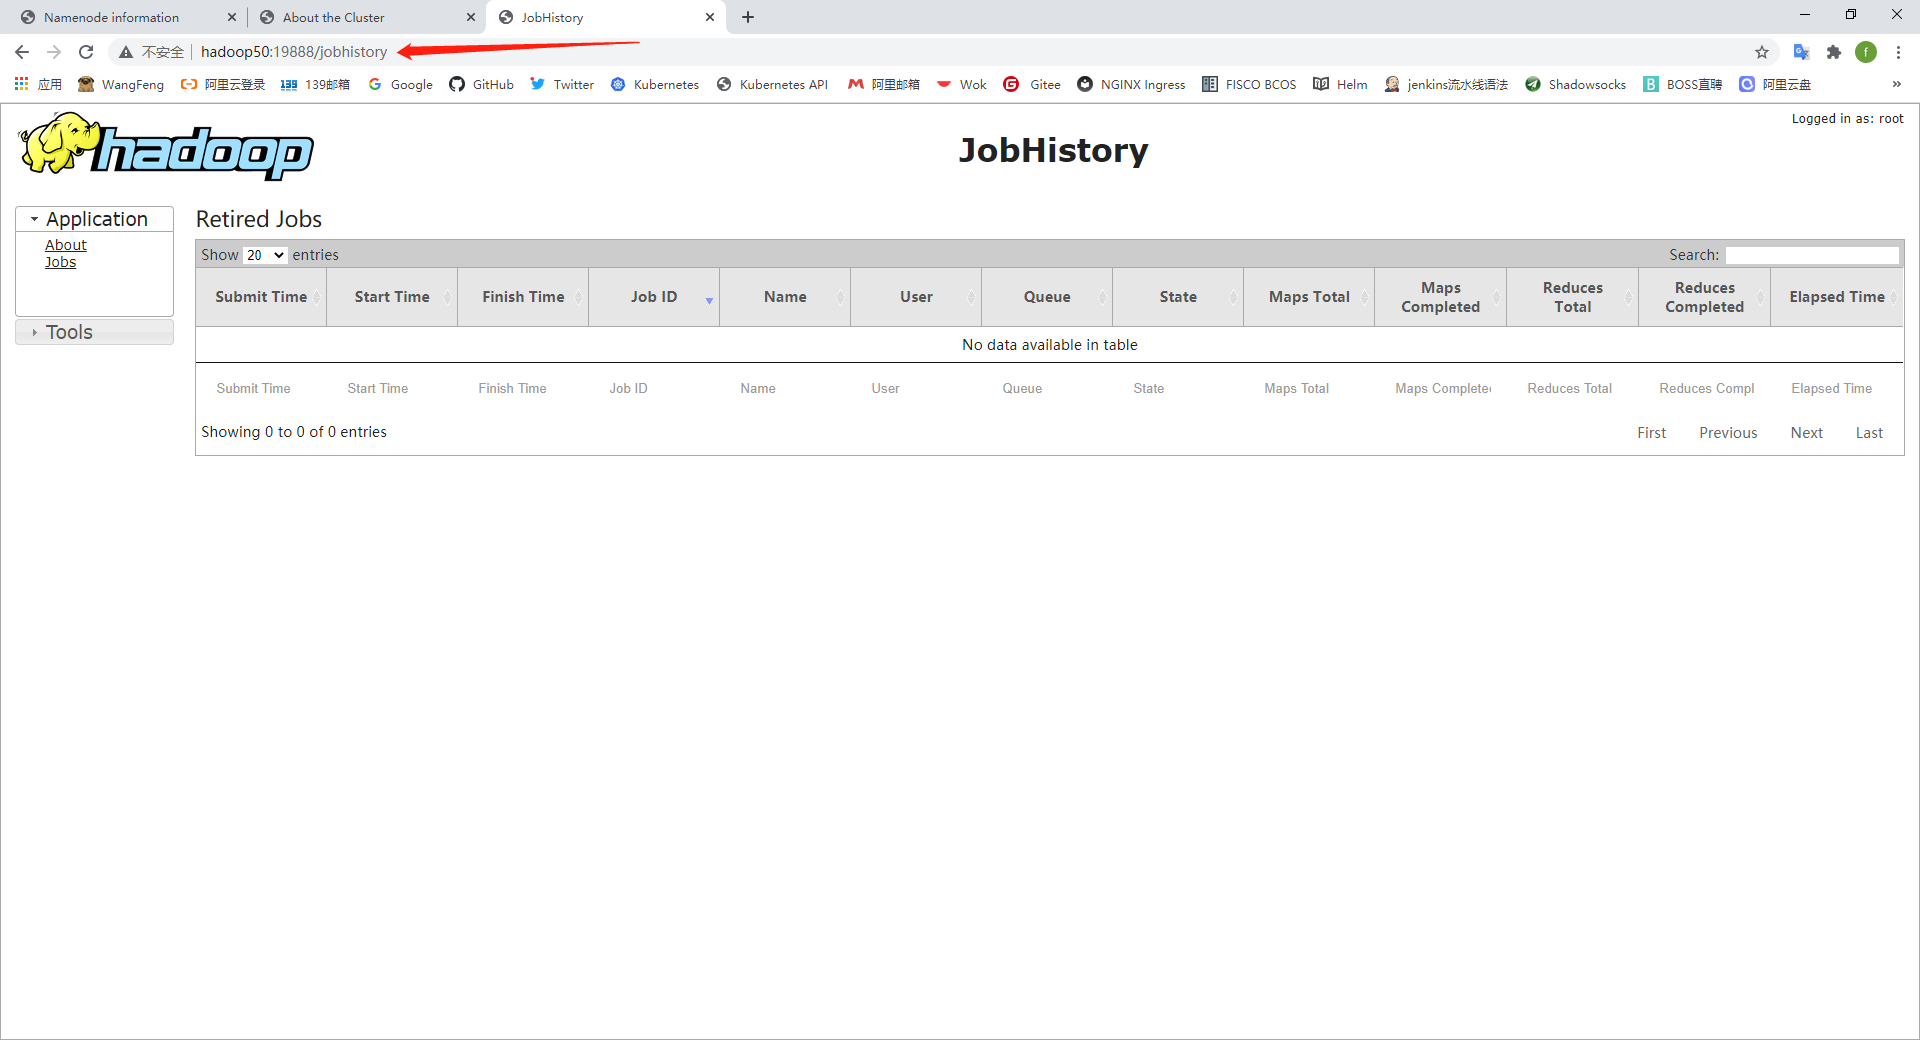
五、Web界面
Hadoop集群启动并运行后,如下所述检查组件的Web UI:
| 守护进程 | 网页界面 | 笔记 |
|---|---|---|
| NameNode | http:// nn_host:port / | 默认的HTTP端口是9870。 |
| ResourceManager | http:// rm_host:port / | 默认的HTTP端口为8088。 |
| MapReduce JobHistory Server | http:// jhs_host:port / | 默认的HTTP端口是19888。 |
六、验证集群
- 关闭状态为 active 的 namenode
另外两台 namenode其中一台 会成为 active 状态
重新启动 hadoop-daemon.sh start namenode 第一台 namenode,会成为 standby 状态
- 关闭状态为 active 主机的 ZKFC
另外两台 ZKFC 其中一台会将本机的 namenode 提升为 active
关闭 ZKFC 所在的 namenode 降级为 standby
重新启动 ZKFC hadoop-daemon.sh start zkfc 依然为 standby
-
Yarn 高可用验证命令
 $ yarn rmadmin -getServiceState rm1
 active

 $ yarn rmadmin -getServiceState rm2
 standby
关闭rm1 rm2 将成为acrive 状态。